Claude Code Beyond the Basics: Skills, Rules, and Agents
As a web developer, you can start using Claude Code in VS Code almost immediately after installing the extension. Even without any advanced setup, it already handles a surprising amount of routine work. You can treat it like a developer who handles routine implementation tasks under supervision, helps with refactoring, upgrades libraries and frameworks, generates tests, updates documentation after code changes, or reviews your code before commits.
That alone can remove a lot of repetitive work from day-to-day development. But to get real value from it in a production project, it helps to understand the workflows, project structure, and best practices that make AI-assisted development actually reliable.
Getting Familiar with the Claude Code Chat
First, let’s look at the Claude chat window.

At the top, from left to right, you can see the current session title (“Untitled” before the session starts), buttons for session history and creating a new session. In the middle is the chat area, and below it the prompt input.
At the bottom there are icons for adding attachments, selecting a command, in the middle - currently opened file or selected lines from the active editor, the current permission mode, and the submit button.
In practice, working with Claude Code is usually very simple. You type a request in the prompt area, often almost like talking to another developer:
Refactor this component
Upgrade Next.js to the latest version
Fix TypeScript errors
Generate Playwright tests for this page
Review current git diff
During execution, Claude may ask for permissions to read files, traverse directories, run bash commands, install packages, or modify code. The chat window shows the whole process step by step: what Claude is currently analyzing, what commands it runs, what files it reads, and what changes it makes.
After finishing the task, it usually explains the completed changes, mentions important decisions, and may suggest follow-up improvements or manual checks.
Requests can also include attachments such as screenshots, logs, copied stack traces, design mockups, or specification documents. This is especially useful for UI fixes, debugging, or converting designs into components.
You can also select commands from the built-in command list and switch between different permission modes depending on how much autonomy you want to give Claude in the current session.
We will cover these workflows in more detail below, along with practical Claude Code configuration for daily development.
Claude Code can be configured directly inside your project. A fairly common setup looks like this:
your-project/
├── CLAUDE.md                  # team instructions (committed)
├── CLAUDE.local.md            # your personal overrides (gitignored)
│
└── .claude/
    ├── settings.json          # permissions + config (committed)
    ├── settings.local.json    # personal permission overrides (gitignored)
    │
    ├── commands/              # custom slash commands → /project:name
    │   ├── review.md
    │   ├── fix-issue.md
    │   └── deploy.md
    │
    ├── rules/                 # modular instruction files (loaded conditionally)
    │   ├── code-style.md
    │   ├── testing.md
    │   └── api-conventions.md
    │
    ├── skills/                # auto-invoked multi-step workflows
    │   ├── security-review/
    │   │   └── SKILL.md
    │   └── deploy/
    │       └── SKILL.md
    │
    ├── agents/                # specialized subagents with isolated context
    │   ├── code-reviewer.md
    │   └── security-auditor.md
    │
    └── docs/                  # reference docs that skills pull in on demand
        └── architecture.md

~/.claude/                     # global (applies to ALL your projects)
    ├── CLAUDE.md
    ├── settings.json
    ├── commands/
    ├── skills/
    └── agents/
This structure separates shared team rules from personal preferences and local developer setup. Further below we will look at how these files are actually used in real development workflows and practical day-to-day tasks.
Managing Claude Permissions
Before anything else, we need to keep sensitive information away from Claude. By default, Claude asks for permission before accessing files and assets within the project (permissions docs). If you allow it, Claude remembers your choice. To be safe, it is better to explicitly deny access to files and directories that contain sensitive information. For example .claude/settings.json:
{
  "permissions": {
    "deny": [
      "Read(.env*)",
      "Edit(.env*)",
      "Write(.env*)",
      "Read(*.pem)",
      "Edit(*.pem)",
      "Write(*.pem)",
      "Read(*.key)",
      "Edit(*.key)",
      "Write(*.key)",
      "Read(*.p12)",
      "Edit(*.p12)",
      "Write(*.p12)",
      "Read(*.pfx)",
      "Edit(*.pfx)",
      "Write(*.pfx)",
      "Read(*.crt)",
      "Edit(*.crt)",
      "Write(*.crt)",
      "Bash(*.env*)",
      "Bash(*.pem*)",
      "Bash(*.key*)",
      "Bash(*.p12*)",
      "Bash(*.pfx*)",
      "Bash(*.crt*)",
      "Bash(*.csr*)",
      "Bash(*id_rsa*)",
      "Bash(*id_ed25519*)",
      "Bash(*id_dsa*)",
      "Bash(printenv*)"
    ],
    "allow": [
      "Bash(grep -E \"\\\\.\\(ts|tsx|js|jsx\\)$\")"
    ]
  },
  "hooks": {
    "PreToolUse": [
      {
        "matcher": "Read|Edit|Write",
        "hooks": [
          {
            "type": "command",
            "command": "bash .claude/hooks/block-sensitive-files.sh",
            "statusMessage": "Checking for sensitive file access..."
          }
        ]
      }
    ]
  }
}
This config prevents Claude from reading/editing files and run bash commands that may contain sensitive data. As you can see, it also references a hook that blocks Claude Code from reading, editing, or writing sensitive files:
File: .claude/hooks/block-sensitive-files.sh
#!/usr/bin/env bash
input=$(cat)
path=$(printf '%s' "$input" | jq -r '.tool_input.file_path // empty')

[[ -z "$path" ]] && exit 0

if printf '%s' "$path" | grep -qE '(\.env([^/]|$)|\.pem$|\.key$|\.p12$|\.pfx$|\.crt$|\.csr$|id_rsa$|id_ed25519$|id_dsa$/)'; then
  printf '{"hookSpecificOutput":{"hookEventName":"PreToolUse","permissionDecision":"deny","permissionDecisionReason":"Access to sensitive file blocked by security policy"}}'
fi
Choosing a Claude Permission Mode
One thing that quickly becomes important in daily work is choosing the right permission mode for Claude Code. Depending on the task, you may want Claude to only analyze the project, actively edit files, or work somewhere in between.
Claude provides several modes for that: “Ask before edits”, “Edit automatically”, and “Plan mode”. There is also an “Auto mode” where Claude tries to decide itself how much access it needs for the current task.

For small fixes and regular development work, “Ask before edits” is usually comfortable enough. Claude can inspect the codebase, suggest changes, and ask for approval before modifying files or running commands.
When working on repetitive tasks like generating tests, fixing lint errors, updating imports, or doing mechanical refactoring, “Edit automatically” can save a lot of time because you no longer need to approve every single step.
For larger tasks though, “Plan mode” is often the most useful option. Especially when the expected changes will touch several files or multiple parts of the architecture.
In this mode Claude behaves more like a technical analyst. It reads files, explores the codebase, follows dependencies, and asks clarifying questions if needed. But it does not change files or execute shell commands. Instead, it generates a reviewable implementation plan as a Markdown document.
By default these plans are stored in:
~/.claude/plans/
You can change this location through the plansDirectory setting in .claude/settings.json.
In practice this workflow is very useful for framework migrations, larger refactorings, security audits, feature planning, or any task where you want to understand the scope before allowing automated changes.
Another nice detail is that plans are not tied to a specific chat session. Even later, in a completely different session, you can ask Claude to continue working from a previously generated plan.
For example:
Follow implementation plan from:

~/.claude/plans/nextjs-migration.md

Start from phase 1 and stop before running tests.
Or more simply:
Implement the plan from plans/auth-refactoring.md
This makes it easy to split large tasks into separate review and execution stages.
Standing project context & conventions
Depending on the scope, you can create a CLAUDE.md file in the project root, in a specific subdirectory (for example ./src/app/api/), or under ~/.claude/. It’s like an agreement between you and the model. Every time Claude Code starts, this document is automatically injected into context, so the model will definitely read it. Initially, you can generate a CLAUDE.md file based on the actual codebase structure by running /init in Claude chat/console. Then you can extend it with your own conventions. For example for any text messages generated by Claude we can define style like:
File: ./CLAUDE.md
## Human-Like Writing Style

When generating any user-facing text (UI copy, notifications, emails, release notes):

- No em dashes (`—`)
- No AI filler: "It looks like...", "Please note that...", "Here's what happened..."
- No motivational/empathetic padding unless explicitly requested
- Mix short and medium sentences; avoid perfectly symmetrical structures
- Write like an experienced engineer, not a customer-support bot

Prefer: `Your verification link expired.`
Avoid: `It looks like your verification link may have expired before you had a chance to use it.`
Skills
Skills are reusable instruction sets for specific tasks and workflows. Unlike rules, skills are loaded only when invoked, which makes them useful both for organization and token savings.
In practice, skills work well for repeatable multi-step procedures, code reviews, audits, release preparation, documentation generation, testing workflows, or anything you find yourself asking Claude to do over and over again.
A typical skill lives inside .claude/skills/ and contains a SKILL.md file with instructions.
For example:
File: .claude/skills/summarize-changes/SKILL.md
---
name: summarize-changes
description: Summarizes uncommitted changes and flags anything risky before committing
---

# Summarize Changes

When this skill is invoked:

1. Run `git diff` to see all uncommitted changes
2. Group changes by type: new features, bug fixes, refactors, deletions
3. Write a short human-readable summary (3–5 bullet points max)
4. Flag any changes that look risky:
   - Deleted files or functions
   - Changes to auth, payments, or security-related code
   - Large diffs with no obvious purpose
5. Suggest a conventional commit message based on the summary

Keep the tone concise. No need to list every file, focus on intent and risk.
Once created, the skill can be invoked directly from the Claude prompt input using a slash command:
/summarize-changes

This approach becomes especially useful over time because your team gradually builds a library of reusable workflows tailored to the project.
You are not limited to custom skills either. There are already community-maintained collections such as: https://github.com/VoltAgent/awesome-agent-skills
One skill I personally use quite often is Addy Osmani’s web quality audit skill: https://officialskills.sh/addyosmani/skills/web-quality-audit
It runs a fairly comprehensive website audit covering performance, accessibility, SEO, and general best practices based on Lighthouse checks. For frontend projects it is a very practical way to automate routine quality reviews directly from Claude Code.
Rules
Rules are persistent instructions that can be loaded either conditionally or for every conversation. To see how they work, let’s create a rule for AI-powered code reviews.
File: .claude/rules/diff-review.md
# AI Review Rules

Be critical and suspicious.
Assume subtle bugs exist.

Focus on:

## Architecture
- accidental architectural regressions
- violations of Next.js 15/16 best practices
- unnecessary abstractions
- over-engineering
- hidden coupling
- server/client boundary mistakes

## React
- hydration risks
- unstable rendering behavior
- unnecessary useEffect usage
- derived state in effects
- stale closures
- memoization misuse
- unnecessary client components
- React 19 anti-patterns

## Next.js
- SSR issues
- cache invalidation mistakes
- async server component mistakes
- route handler edge cases
- misuse of server actions
- improper loading/error boundaries

## Security
- auth/token leakage risks
- unsafe HTML rendering
- upload validation issues
- SSR data exposure
- missing permission checks

## Code Quality
- unnecessary complexity
- dead code
- weak naming
- hidden side effects
- duplicated logic
- weak error handling
Since this rule does not define a scope, you can promote it to a permanent ruleset by referencing it from CLAUDE.md:
## Code Review
When reviewing code, apply the rules in `.claude/rules/diff-review.md`.
After that, Claude will automatically apply these review criteria whenever you request a code review, including when using built-in commands such as /code-review.
You can also invoke the rule explicitly at any time:
Review the current diff.

Apply all rules from `.claude/rules/diff-review.md`.
Commands
To understand custom slash commands, let’s create one that runs a code review against a predefined set of review rules.
File: .claude/commands/diff-review.md
Run `git add -N . && git diff HEAD > .claude/current.diff` in the shell, then review `.claude/current.diff` using the rules in `.claude/rules/diff-review.md`.
This command captures all changes since the last commit, including newly added files, and saves the diff to .claude/current.diff. Claude then reviews those changes using the rules defined in .claude/rules/diff-review.md.
Once the file is created, a new slash command becomes available: /diff-review.
Running /diff-review performs the entire workflow automatically.
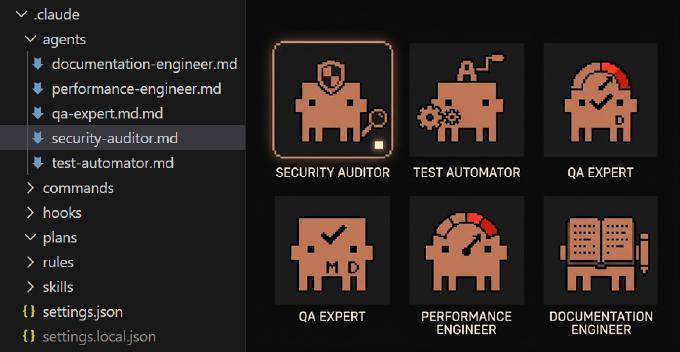
Agents
Claude Code also supports custom agents (sometimes called subagents). Each agent has its own system prompt, tool permissions, and model preference. When Claude decides a task is a good fit for a specialized agent, it launches that agent in a separate context window.
File: .claude/agents/security-auditor.md:
---
name: security-auditor
description: Expert security reviewer. Use PROACTIVELY after changes to auth or data handling.
tools: Read, Grep, Glob
model: opus
---
You are a senior security engineer. Check for OWASP Top 10 vulnerabilities...
The tools field restricts what the agent can do. In this example, the security auditor can only read and search the codebase. It cannot modify files or execute commands. The model field lets you choose the most appropriate model for the task. Lightweight agents often work well with Haiku, while more complex analysis may benefit from Sonnet or Opus.
Once configured, Claude can automatically delegate work to a subagent when it determines the agent is relevant to the current task. You can also invoke an agent explicitly:
@security-auditor audit the auth module for vulnerabilities
This bypasses automatic routing and sends the task directly to the specified agent.
You can find community-maintained subagents in the VoltAgent Awesome Claude Code Subagents repository.
Rules vs Skills vs Agents: Which One Should You Use?
A simple way to think about them is:
Rules define how Claude should behave.
Use rules for coding standards, architecture requirements, security guidelines, review checklists, or any instructions that should consistently influence Claude’s decisions.
Skills define repeatable workflows.
Use skills when a task involves multiple steps that you perform regularly, such as reviewing changes, preparing releases, generating documentation, auditing code, or analyzing logs.
Agents define specialists.
Use agents when a task benefits from a dedicated expert with its own instructions, permissions, and model configuration. Examples include security reviews, performance audits, accessibility checks, or architecture analysis.
A useful rule of thumb:
- If it is a guideline, use a Rule
- If it is a procedure, use a Skill
- If it is a specialist role, use an Agent
Most mature Claude Code setups use all three together. Rules establish project standards, skills automate common workflows, and agents provide deeper analysis when specialized expertise is needed.
Conclusion
Claude Code becomes much more valuable once you move beyond simple chat prompts. Project-level instructions, permission controls, reusable skills, review rules, custom commands, and specialized agents help it understand your codebase and work more consistently.
The goal is not to let AI replace engineering decisions. It is to automate repetitive work, enforce team conventions, and reduce context-switching. A few hours spent configuring Claude Code can save many more during daily development, code reviews, migrations, and maintenance.