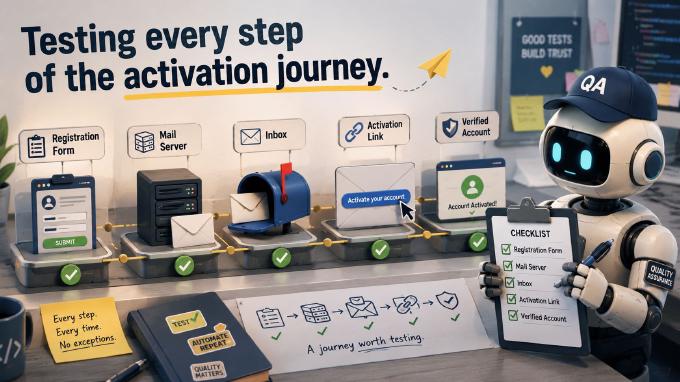
Testing Email Activation in Sign-Up Flows
Functional testing is nothing new. We all do it, to varying degrees, with different tools and approaches. But when flows involve transactional emails (signup confirmations, password resets, purchase notifications), things get trickier. You instruct your testing tool to navigate to the registration page, fill out the form, and click submit. The app sends a confirmation email with an activation link. Now your tool needs to read that email, parse it, and navigate to the link.
The first challenge is connecting the testing tool to the mail server. If the server exposes a REST API, that’s easy. Otherwise, consider a specialized service such as Sendgrid, Mailgun, Email Yak, or Postmark.
Mail Server API
You can also use Restmail.net. It’s free, requires no registration, lets you create inboxes dynamically, and exposes a REST API to read received emails. The downside: all messages are public. The API is straightforward:
GET /mail/<user>
DELETE /mail/<user>
Send an email to [email protected] and retrieve its contents with GET /mail/joe1. Delete it afterwards with DELETE /mail/joe1.
Polling Inbox
How do we use this in test cases? We need a function that polls the mail server API for new messages, finds emails sent during the test session, parses the activation link, and returns it for subsequent test steps. Here’s an implementation:
 function pollForValue({ url, interval, timeout, parserFn, parserPayload = {}, requestFn = null }) {
    const request = requestFn ? requestFn : async ( url ) => {
      const rsp = await fetch( url );
      if ( rsp.status < 200 || rsp.status >= 300  ) {
        return {};
      }
      return await rsp.json();
    };

    return new Promise(( resolve, reject ) => {
      const startTime = Date.now();
      pollForValue.attempts = 0;

      async function attempt() {
        if ( Date.now() - startTime > timeout ) {
          return reject( new Error( `Polling: Exceeded timeout of ${ timeout }ms` ) );
        }
        const value = parserFn( await request( url ), parserPayload );
        pollForValue.attempts ++;
        if ( !value ) {
          return setTimeout( attempt, interval );
        }
        resolve( value );
      }
      attempt();

    });
 }
Call this function and it polls a given URL until a message arrives or the timeout is reached. It returns the parsed value (the activation link, for example) and accepts an options object with the following properties:
- url – REST API resource, e.g. http://restmail.net/mail/
- interval – interval between polling requests in ms
- timeout – maximum time allowed for the function to loop in ms
- parserFn – callback that receives the REST API response and parses it for the desired value; polling continues until
parserFnreturns a truthy value (or timeout) - requestFn – (optional) a callback to replace the default
window.fetch - parserPayload – (optional) extra payload passed to
parserFn
Test Application
We have the mail server API and the polling function. Now we’ll try this across a few testing tools using a real-world example. Assume we’re testing an ACME forum application built with NodeBB. The goal is to fill out the registration form at http://localhost:4567/register and submit it:

This brings us to the next page where we check the GDPR checkboxes.
After the form is submitted, the app sends a confirmation email. That’s where pollForValue comes in. We call it to poll the REST API until the email arrives. To extract the activation link from NodeBB’s default email template:
function parseActivationLink( text ) {
    const re = /(http\:[^\"]+4567\/con[^\"]+)/g,
          res = text.match( re );
    return res ? res[ 0 ].replace( "=\r\n", "" ) : null;
}
This gives us the activation URL, which we visit to complete the registration.
Testing with Selenium WebDriver
Selenium WebDriver is probably the most popular testing tool. Not the simplest to set up, but well-known. After setting up the Node.js environment, the test case up to the point where the app sends the activation email looks like this:
const { Builder, By, Key, until } = require( "selenium-webdriver" );

(async function main() {
  const driver = await new Builder().forBrowser("chrome").build(),
        USER = "ctest1";
  try {
    await driver.get( "http://localhost:4567/register" );

    await driver.findElement( By.id("email" ) )
      .sendKeys( `${ USER }@restmail.net`, Key.RETURN );
    await driver.findElement( By.id("username" ) )
      .sendKeys( USER , Key.RETURN );
    await driver.findElement( By.id("password" ) )
      .sendKeys( `Password1234`, Key.RETURN );
    await driver.findElement( By.id("password-confirm" ) )
      .sendKeys( `Password1234`, Key.RETURN );

    await driver.findElement( By.id("gdpr_agree_email" ) )
      .click();

    await driver.findElement( By.id("gdpr_agree_data" ) )
      .click();

    await driver.findElement( By.css("#content form button" ) )
      .click();

    //…

  } catch ( e ) {
    console.log( e );
  } finally {
    await driver.quit();
  }
})();
We fill in the first form using a restmail.net email address. After the last field, the form submits automatically. Then we check the GDPR boxes and click submit. To poll for the email, add node-fetch at the top:
const fetch = require( "node-fetch" );
Then include the pollForValue and parseActivationLink functions. The test continues:
   const activationLink = await pollForValue({ url: `http://restmail.net/mail/${ USER }`,
      interval: 1000,
      timeout: 600000,
      parserFn: ( messages ) => {
          if ( !messages ) {
            return null;
          }
           const sentAt = new Date( Date.now() - 1000 ),
                 unseen = messages.find( msg => new Date( msg.receivedAt ) > new Date( sentAt ) );
          return parseActivationLink( messages[0].html );
      }
    });

    console.log( "Activation link:", activationLink );

    await driver.get( activationLink );
After submitting the second form, the script polls for the new email. Once it arrives, we parse the body for the activation link and navigate to it.

Testing with Cypress
Cypress has been gaining traction, especially for test debugging. Without the email polling, the test script looks like this:
const USER = "ctest1";
describe("User registration flow", () => {
    it( "registers user", ( done ) => {
      cy.visit( "http://localhost:4567/register" );

      cy.get( "#email" ).type( `${ USER }@restmail.net` );
      cy.get( "#username" ).type( USER );
      cy.get( "#password" ).type( "Password1234" );
      cy.get( "#password-confirm" ).type( "Password1234" );
      cy.get( "#register" ).click();
      cy.wait( 1000 );
      cy.get("#gdpr_agree_email").click();
      cy.get("#gdpr_agree_data").click();
      cy.get("#content form button.btn-primary").click();

      //...
      done();

    })
  })
The same pollForValue and parseActivationLink functions apply here. The difference from Selenium: instead of node-fetch, we use Cypress’s built-in cy.request. That’s what the requestFn option is for:
      pollForValue({ url: `http://restmail.net/mail/${ USER }`,
            interval: 1000,
            timeout: 600000,
            parserFn: ( messages ) => {
                if ( !messages ) {
                    return null;
                  }
                   const sentAt = new Date( Date.now() - 1000 ),
                         unseen = messages.find( msg => new Date( msg.receivedAt ) > new Date( sentAt ) );
                  return parseActivationLink( messages[0].html );
            },
            requestFn: ( url ) => {
                return new Promise(( resolve ) => {
                    cy.request( url )
                        .then( (response) => {
                            resolve( response.body );
                        } );
                });
            }
      }).then(( link ) => {
        activationLink = link;
        console.log( "Activation link:", activationLink );
        done();
      });
Declare activationLink at the top:
let activationLink;
Then visit it in the next test:
it( "follows the activation link", () => {
   cy.visit( activationLink );
})

Testing with Puppetry
The two examples above used scripted tools. Now let’s look at Puppetry, a code-free alternative. Instead of writing scripts, you define test specs through a GUI (or record user behavior). Either way, you end up with a test suite containing a table of target elements:

And the test case:

In this example I used template variables. TEST_USER_ALIAS resolves to ctest1, ctest2, etc. on each run. I referenced it in the email field, applied {{ faker( "internet.userName", "en" ) }} to generate realistic usernames, and referenced a few environment-dependent variables. Other than that the test steps should be readable on their own.

To add mail server polling, include the command corresponding to the pollForValue function:

Pass in the retrieval and parsing logic from the earlier examples. This resolves into a new template variable ACTIVATION_LINK, which is used to visit the confirmation page:

Results:


Recap
Testing user flows that involve transactional emails is simpler than it looks. You need an API to access the mail server and a polling function like the one in this article. It works across most testing tools, including whichever one you’re already using.