Next.js 15 Tutorial: Build a Full-Stack App with Ant Design & React Query

At the beginning of 2025, Next.js is likely the best choice for React developers building server-side applications. Personally, I’m used to developing apps without a framework. I typically use Express.js to write a REST API server with both SSR and client-side rendering. While this approach offers maximum flexibility, it comes at the cost of excessive boilerplate code. It also requires manually handling caching, pre-fetching, routing, HTTP cache management, and more. Take image optimization, for example. We need to compress images, serve different sizes and formats for compatibility, implement lazy-loading, and provide placeholders (LQIP, blur-up, etc.). Next.js 15 takes care of all this automatically.
Let’s see if Next.js really lives up to its reputation. We’ll build an app using Next.js 15, incorporating Ant Design 5 for UI components and React Query 5 for data fetching and state management.
Getting Started with Next.js 15
Ensure you have Node.js 18 or higher installed. Then, use create-next-app to set up the project:
npx create-next-app@latest demoapp

✔ Would you like to use TypeScript? … No / Yes
✔ Would you like to use ESLint? … No / Yes
✔ Would you like to use Tailwind CSS? … No / Yes
✔ Would you like your code inside a `src/` directory? … No / Yes
✔ Would you like to use App Router? (recommended) … No / Yes
✔ Would you like to use Turbopack for `next dev`? … No / Yes
✔ Would you like to customize the import alias (`@/*` by default)? … No / Yes

cd demoapp
The folder structure will look like this:

Since we won’t be using CSS Modules, we can remove page.module.css from src/app and delete its reference in page.tsx. We also don’t need the default markup, so we replace it with a placeholder:
src/app/page.tsx*
export default function Home() {
  return (<div></div>);
}
Defining Our App Structure
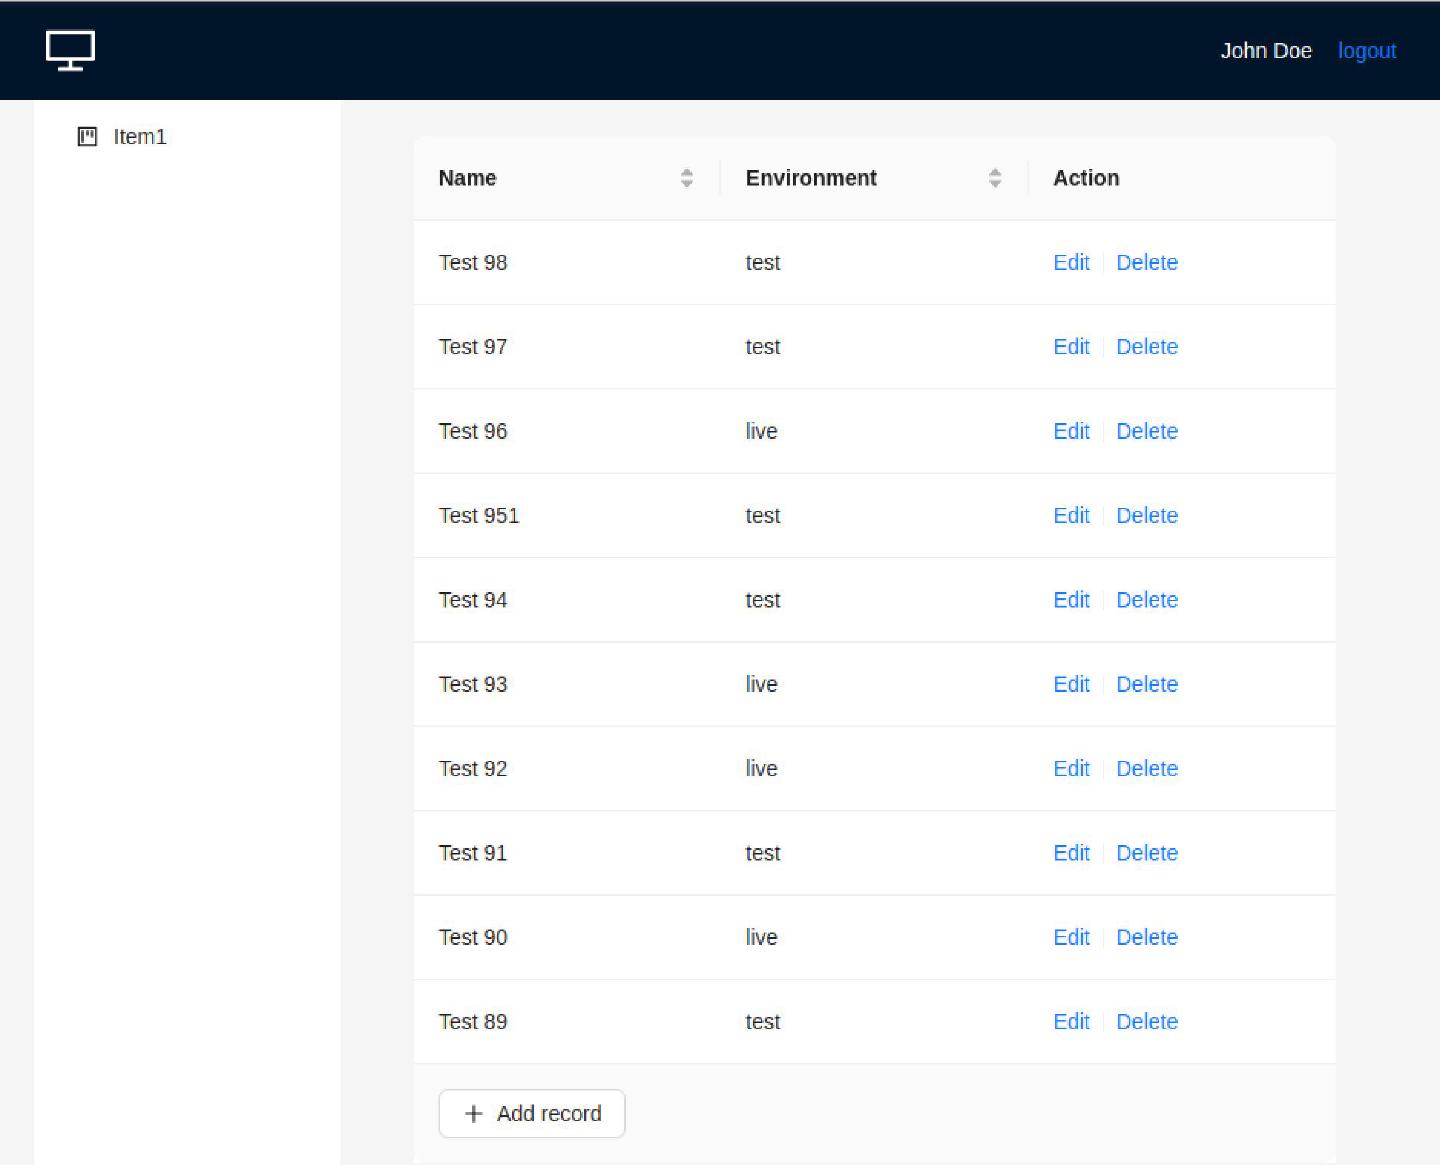
We’re building a table-based UI for managing records (e.g., projects). The main component is a table displaying records, with options to delete or edit each entry. Below the table, there’s an “Add Record” button. Clicking it (or the “Edit” button) opens a modal form where users can input data. The page will also include a placeholder navbar (header) and sidebar.
Integrating Ant Design
To achieve a polished look, we’ll use Ant Design components: Table and Layout. First, install the required dependencies:
npm i antd @ant-design/icons @ant-design/nextjs-registry @ant-design/v5-patch-for-react-19
Following Next.js best practices, we’ll separate markup into layouts and pages. Since the navbar and sidebar are shared across pages, they belong to the layout, while the table will reside in a specific page.
Updating layout.tsx in src/app:
import "@ant-design/v5-patch-for-react-19";
import React from "react";
import type { Metadata } from "next";
import { Layout } from "antd";
import { AntdRegistry } from "@ant-design/nextjs-registry";
import { Content } from "antd/lib/layout/layout";

export const metadata: Metadata = {
  title: "Projects",
  description: "Demo app built with Next.js 15, Ant Design v5, and React Query v5.",
};

export default function RootLayout({
  children
}: Readonly<{
  children: React.ReactNode;
}>) {
  return (
    <html lang="en">
      <body>
        <React.StrictMode>
              <AntdRegistry>

                  <Layout className="container-root">
                    Navbar goes here
                      <Layout className="container-main">
                        Sidebar goes here
                        <Layout className="container-content">
                            <Content className="content" >
                              { children }
                            </Content>
                        </Layout>
                      </Layout>

                  </Layout>

              </AntdRegistry>
        </React.StrictMode>
      </body>
    </html>
  );
}
Here, we use AntdRegistry to extract and inject Ant Design’s first-screen styles into HTML, preventing page flicker.
Additionally, we import the Layout component from the antd package in a specific way:
import { Content } from "antd/lib/layout/layout";
This approach differs from the official documentation. By default, Next.js treats components as server-side, meaning state and context are unavailable. While we could simply switch components to the client side, I prefer to render the layout using SSR. To achieve this, we need to import Ant Design’s composite components in a specific way.
Other than that, you may have noticed a few classes used in the markup. While we could define them in global.css, I prefer using SASS. So, let’s install the package:
npm i -D sass
Replace globals.css with globals.scss and add some styling:
src/app/globals.scss
body {
    margin: 0;
    padding: 0;
}

.container-root {
  min-height: 100vh !important;
  .container-main {
    flex-direction: row;
  }
  .container-content {
    padding: 0 24px 24px;
  }

  .content {
      padding: 24px;
      margin: 0;
      min-height: 280px;
  }
}
Next, import globals.scss into the layout file:
import "./globals.scss";
The layout also includes the metadata object, allowing Next.js to manage global and local page metadata more elegantly than solutions like React Helmet.
Implementing Navbar and Sidebar Components
Since these components are independent of routing, we place them outside the app scope.
src/ui/Navbar/Navbar.tsx
import React from "react";
import { Divider } from "antd";
import { Header } from "antd/lib/layout/layout";
import { DesktopOutlined } from "@ant-design/icons";

const AppHeader: React.FC = () => (<Header style={{
          display: "flex",
          alignItems: "center",
        }}>
    <a className="logo">
      <DesktopOutlined />
    </a>
    <div style={{ color: "white" }}>
        John Doe
        <Divider type="vertical" />
        <a>logout</a>

    </div>
  </Header>);

export default AppHeader;
src/ui/Sidebar/Sidebar.tsx
import React from "react";
import { ProjectOutlined } from "@ant-design/icons";
import {  Menu } from "antd";
import type { MenuProps } from 'antd';
import Sider from "antd/lib/layout/Sider";

const menu = [ "Item1" ];

const Sidebar: React.FC = () => {
    const items: MenuProps[ "items" ] = menu.map( project => ({
      label: project,
      key: project,
      icon: <ProjectOutlined />
    }) );

    return ( <Sider width={ 200 } style={{ background: "#fff" }}>
        <Menu
          mode="inline"
          style={{ height: "100%", borderRight: 0 }}
          items={ items } />
      </Sider> );
};

export default Sidebar;
Now, run the development server:
npm run dev
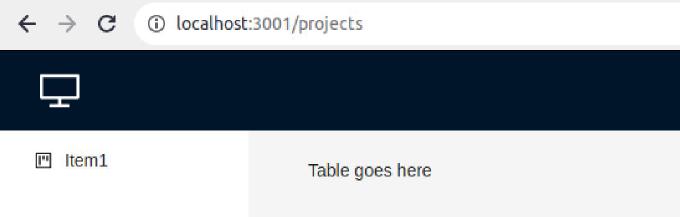
Open http://localhost:3000 (assuming port 3000 is available) to view the basic layout.

Dynamic Routing
Currently, we have page.tsx at the root of the app directory. Since our goal is to develop a UI for managing projects, we should make this page accessible via the /projects route.
Following Next.js dynamic route conventions, we can simply move the file to src/app/projects.
But wait, there’s more to consider!
- The
/projectsroute should display a table of projects. - The
/projects/[id]route should allow editing a selected project.
To accommodate both cases, we should place the file in src/app/projects/[id], or better yet, use a catch-all route src/app/projects/[[...id]]/. This way, the same page.tsx can handle both the project list and the record editing view. The idea is to always display the table, and when editing a project, show a modal with the form.

Since we don’t have an index page, we redirect the root URL to /projects in next.config.ts:
import type { NextConfig } from "next";

const nextConfig: NextConfig = {
  async redirects() {
    return [
      {
        source: "/",
        destination: "/projects",
        permanent: true
      }
    ]
  }
};

export default nextConfig;
Implementing Record Editing with Parallel Routes
Now that the table page is clear, what about handling record editing?
One approach is to use usePathname to conditionally render a modal window within the page. However, a more sophisticated method is to use parallel routes, which offer benefits like route-aware caching, prefetching, code splitting, and partial rendering.
Using Parallel Routes for a Modal
With parallel routes, we can define a slot — similar to a page.tsx file, that renders within the layout whenever the URL matches a specific route. Since we need a slot for the modal window, we’ll name it accordingly:
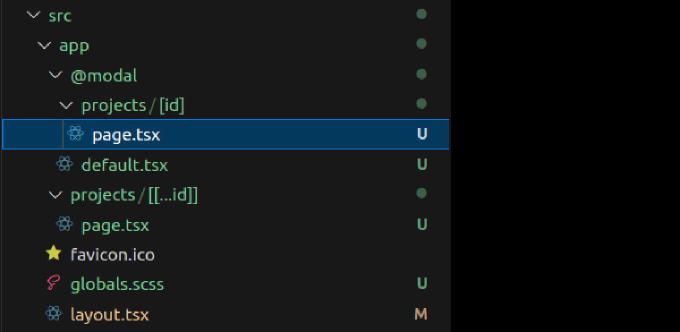
The slot must be prefixed with the @ symbol, but otherwise, the setup is similar to dynamic routes:
src/app/@modal/projects/[id]/page.tsx
export default async function ProjectsModal({
  params,
}: {
  params: Promise<{ id: string }>;
}) {

  return <div>Modal window goes here</div>;
}
Additionally, we need a default.tsx file, which will be rendered in the slot when no matching route is found:
src/app/@modal/default.tsx
export default function Default() {
  return null;
}
Now, let’s integrate the modal slot into the layout:
src/app/layout.tsx
export default function RootLayout({
  children, modal
}: Readonly<{
  children: React.ReactNode;
  modal: React.ReactNode;
}>) {
  return (
    <html lang="en">
      <body>
        <React.StrictMode>
              <AntdRegistry>

                  <Layout className="container-root">
                    <Navbar />
                      <Layout className="container-main">
                        <Sidebar  />
                        <Layout className="container-content">
                            <Content className="content" >
                              { children }
                              { modal }
                            </Content>
                        </Layout>
                      </Layout>

                  </Layout>

              </AntdRegistry>
        </React.StrictMode>
      </body>
    </html>
  );
}

This approach keeps the table visible at all times while displaying a modal for editing when needed.
You can find a complete example of a Next.js app demonstrating dynamic routing with modals as routes here.
Data Fetching
When it comes to data fetching, it’s important to distinguish between server-side and client-side components:
- Server-side components can directly interact with an ORM or database.
- Client-side components typically use REST APIs to fetch or mutate data on the server.
To handle database interactions, I created a simple DB client using the mysql2 npm package.
Since page.jsx is a server-side component, I’ll use this client to fetch data from MySQL and pass it down to a child client-side component for rendering.
src/app/projects/[[…id]]/page.tsx
import { projectModel } from "@/utils/model";
import ProjectTable from "./ProjectTable";

export default async function Home() {
  const initialData = await projectModel.findAll();
  return (<div><ProjectTable initialData={ initialData }/></div>);
}
The ProjectTable component uses Ant Design’s Table component to display the data:
src/app/projects/[[…id]]/ProjectTable.tsx
"use client"
import React from "react";
import { Table } from "antd";
import type { ColumnsType } from "antd/es/table";

interface ProjectData {
  id: number,
  name: string,
  env: string,
  createdAt: string,
  key?: string
};

type TableData = {
  total: number;
  rows: any[];
};


const ProjectTable = (
    { initialData }: { initialData: TableData } ) => {

    const columns: ColumnsType<ProjectData> = [
        {
            title: "Name",
            dataIndex: "name",
            sorter: true
        },
        {
            title: "Environment",
            dataIndex: "env",
            sorter: true
        }
    ];

    return <Table<ProjectData>
        columns={ columns }
        dataSource={ initialData ? initialData.rows : [] }
    />;
}

export default ProjectTable;

Handling Dynamic Data Updates
Initially, data will be prerendered during the Next.js build process, generating a static page. However, to update the table dynamically, we need to use route handlers along with a REST API client.
Route handlers act like controllers in an application, responding to REST API calls. You define how requests are handled in a route.ts file, following Next.js conventions:
src/app/api/v1/projects/[[…id]]/route.ts
import { type NextRequest } from "next/server";
import { projectModel } from "@/utils/model";

export async function GET( request: NextRequest ) {
  const searchParams = request.nextUrl.searchParams,
        params = {
          pageSize: searchParams.get( "pageSize" ),
          current: searchParams.get( "current" ),
          sortField: searchParams.get( "sortField" ),
          sortOrder: searchParams.get( "sortOrder" )
        };

  const dataSource = await projectModel.findAll( params );

  return Response.json( dataSource );
}
Now, if we make a request to /api/v1/projects?current=1&pageSize=10&sortOrder=ascend&sortField=name we receive a JSON object containing the requested rows along with the total count from the database.
For making API requests, we can use the built-in fetch function, but I prefer the axios library for its simplicity and additional features:
src/utils/api/index.ts
import axios from "axios";
import { AnyObject } from "@/utils/type";

const client = axios.create({
  baseURL: `/api/v1/`
});

export async function getList( collection: string, params: AnyObject = {} ) {
  const res = await client.get( collection, { params } );
  return res.data;
}
We also update ProjectTable.tsx:
src/app/projects/[[…id]]/ProjectTable.tsx
"use client"
import React, { useState } from "react";
import { Table } from "antd";
import type { TableProps } from "antd";
import type { ColumnsType } from "antd/es/table";
import { getList } from "@/utils/api";

interface ProjectData {
  id: number,
  name: string,
  env: string,
  createdAt: string,
  key?: string
};

type TableData = {
  total: number;
  rows: any[];
};

const ProjectTable = (
    { initialData }: { initialData: TableData } ) => {

    const [ data, setData ] = useState<TableData>( initialData ?? { total: 0, rows: [] } );

    const columns: ColumnsType<ProjectData> = [
        {
            title: "Name",
            dataIndex: "name",
            sorter: true
        },
        {
            title: "Environment",
            dataIndex: "env",
            sorter: true
        }
    ];

    const onTableChange: TableProps<ProjectData>["onChange"] = async (
        { current = 1, pageSize = 10 }, filters, sorter
    ) => {

        const sortOrder = Array.isArray( sorter ) ? sorter[ 0 ]?.order : sorter?.order,
              sortField = Array.isArray( sorter ) ? sorter[ 0 ]?.field : sorter?.field;

        setData( await getList(
            `projects?current=${ current }&pageSize=${ pageSize }&sortOrder=${ sortOrder }&sortField=${ sortField }` ));
    };

    return <Table<ProjectData>
        columns={ columns }
        dataSource={ data.rows }
        onChange={ onTableChange }
    />;
}

export default ProjectTable;
In this file, we define the onTableChange handler, which triggers a REST API call whenever the table is updated whether due to sorting, filtering, or pagination changes. The newly retrieved data is then passed to the Table component for rendering.
Integrating React Query
React Query streamlines data fetching, caching, synchronization, and state management. It’s currently the most popular solution among similar tools, and for good reason. You can explore its benefits in the article Why Do You Need React Query.
To get started, install the necessary packages:
npm i @tanstack/react-query @tanstack/query-core
Optionally, you can also install:
@tanstack/react-query-devtools– for debugging@tanstack/eslint-plugin-query– for linting best practices
Now, we need to create a React Query Client Provider to manage API requests efficiently.
src/utils/providers/ReactQueryProvider.tsx
"use client";

import { QueryClient, QueryClientProvider } from "@tanstack/react-query";
import { useState } from "react";

function ReactQueryProvider({ children }: React.PropsWithChildren) {
  const [client] = useState(new QueryClient());

  return (
    <QueryClientProvider client={client}>
      {children}
    </QueryClientProvider>
  );
}

export default ReactQueryProvider;
We wrap the root children with the provider:
src/app/layout.tsx
//...
import ReactQueryProvider from "@/utils/providers/ReactQueryProvider";
//...
export default function RootLayout({
  children, modal
}: Readonly<{
  children: React.ReactNode;
  modal: React.ReactNode;
}>) {
  return (
    <html lang="en">
      <body>
        <React.StrictMode>
          <ReactQueryProvider>
              ...
          </ReactQueryProvider>
        </React.StrictMode>
      </body>
    </html>
  );
}
Now, let’s see how page.tsx has changed:
src/app/projects/[[…id]]/page.tsx
import { dehydrate } from "@tanstack/query-core";
import { HydrationBoundary, QueryClient } from "@tanstack/react-query";

import ProjectTable from "./ProjectTable";
import { projectModel } from "@/utils/model";

export const dynamicParams = false;

export default async function Projects() {
  const queryClient = new QueryClient();

  await queryClient.prefetchQuery({
    queryKey: [ "projects" ],
    queryFn:  () => projectModel.findAll(),
  });

  return (
    <div>
      <HydrationBoundary state={ dehydrate( queryClient ) }>
        <ProjectTable />
      </HydrationBoundary>
    </div>
  );
}
Here, we use hydration and dehydration to prefetch data for child components. This approach is recommended for improved SEO optimization and better performance.
Receiving data in ProjectTable.tsx:
src/app/projects/[[…id]]/ProjectTable.tsx
// ...

import { useMutation, useQueryClient } from "@tanstack/react-query";
import { remove } from "@/utils/api";

// ...

    const queryClient = useQueryClient(),
          mutation = useMutation({
            mutationFn: ( id: number ) => remove( "projects", id ),
            onSuccess: () => {
                return queryClient.invalidateQueries({ queryKey: [ "projects" ] });
            },
        });

	  const columns: ColumnsType<ProjectData> = [
        // ...
        {
            title: "Action",
            key: "action",
            render: ( _, { id }: ProjectData ) => (
                <span>
                    <a onConfirm={ () => mutation.mutate( id ) }>Delete</a>
                </span>
            ),
        },
    ];
The useQuery function provides the following values:
data– A JSON object received from the REST API.isLoading– A boolean indicating the loading state.error– An object containing error details if an exception occurs.refetch– A function to manually refresh the data.
Conclusion
Next.js 15 proves to be a powerful framework for building modern React applications with server-side capabilities. It streamlines common challenges like routing, image optimization, and caching while offering a structured approach to development. By integrating Ant Design for UI components and React Query for efficient data fetching, we’ve built a scalable, maintainable application with minimal boilerplate.
The combination of server-side and client-side rendering, along with Next.js features like parallel routes and route handlers, enhances performance and user experience. While traditional Express-based setups offer flexibility, Next.js significantly reduces the complexity of managing state, API interactions, and UI updates.
Ultimately, for React developers looking to build server-rendered applications efficiently, Next.js 15 stands out as a robust, feature-rich solution that simplifies development without sacrificing flexibility.